CIS 336 CIS336 CIS/336 ENTIRE COURSE HELP – DEVRY UNIVERSITY
$65.00$75.00
CIS 336 CIS336 CIS/336 ENTIRE COURSE HELP – DEVRY UNIVERSITY
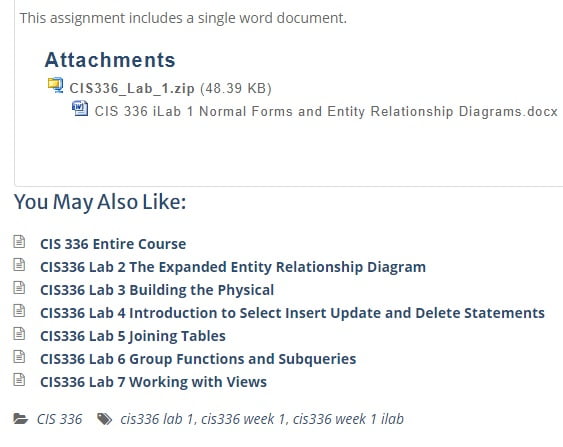
CIS 336 Entire Course
CIS336 Entire Course includes:
- CIS336 Lab 1 Normal Forms and Entity Relationship Diagrams
- CIS 336 Lab 2 The Expanded Entity Relationship Diagram
- CIS336 Lab 3 Building the Physical
- CIS336 Lab 4 Introduction to Select Insert Update and Delete Statements
- CIS336 Lab 5 Joining Tables
- CIS336 Lab 6 Group Functions and Subqueries
- CIS336 Lab 7 Working with Views
Description
CIS 336 CIS336 CIS/336 ENTIRE COURSE HELP – DEVRY UNIVERSITY
CIS 336 Entire Course
CIS336 Entire Course includes:
- CIS336 Lab 1 Normal Forms and Entity Relationship Diagrams
- CIS 336 Lab 2 The Expanded Entity Relationship Diagram
- CIS336 Lab 3 Building the Physical
- CIS336 Lab 4 Introduction to Select Insert Update and Delete Statements
- CIS336 Lab 5 Joining Tables
- CIS336 Lab 6 Group Functions and Subqueries
- CIS336 Lab 7 Working with Views
CIS 336 CIS336 CIS/336 ENTIRE COURSE HELP – DEVRY UNIVERSITY
CIS336 Lab 7 Working with Views
Lab 7 will introduce the concept of database views. This lab may be completed using either DeVry’s Omnymbus EDUPE-APP lab environment, or a local copy of the MySQL database running on your own computer using the OM database tables. The lab will utilize a set of tables that are represented by the ERD (OM_ERD.docx) and are created and populated by the script file (create_OM_db.sql). Follow the instructions in the file CreateOMTables.docx to create your database, tables, and data.
A few IMPORTANT things to note if using EDUPE MySQL:
**There can be NO SPACES in alias names given to a column. For example:
Select unit_price as “Retail Price “ from items; –this does NOT work in EDUPE MySQL.
Any of the following WILL WORK:
1 2 3 4 | Select unit_price as “RetailPrice” from items;Select unit_price as “Retail_Price” from items;Select unit_price as Retail_Price from items;Select unit_price as RetailPrice from items; |
**Any calculated fields MUST be given an alias (and note above NO SPACES in alias). For example:
select unit_price * 2 from items; –this does NOT work in EDUPE MySQL
This will work:
select unit_price * 2 as NewPrice from items;
Deliverables
Lab Report (Answer Sheet) containing both the student-created SQL command(s) for each exercise, and the output showing the results obtained. Be sure your name is on the file.
LAB STEPS: Complete each of the exercises below.
- Use an ALTER TABLE statement to update the customers table so that the Primary Key field is an auto-increment field, then create TWO insert statements to test proper operation, using your own first and last name for one (and a name of your choice for the second one), and any data you care to imagine for the remaining fields.
IMPORTANT NOTE: When using a LOCAL copy of MySQL, if you attempt to simply issue the ALTER TABLE command you have composed by itself, you should receive an error similar to the following (try it for yourself!).
ERROR 1833: Cannot change column ‘customer_id’: used in a foreign key constraint ‘orders_fk_customers’ of table ‘om.orders’
(Note – EDUPE will not give this error message, however you should still follow the CORRECT procedure as discussed here to complete this problem).
The reason for this is that you are attempting to alter data in one column that has a defined PK:FK relationship to a field in another table. Referential Integrity rules prevent this. So, how do you resolve such a problem?
One approach to solving this dilemma is to turn off the foreign key checks that implement referential integrity rules. However, the danger here is that other users and processes operating on the database while these constraints are suspended could create or modify data in a way that compromises integrity. We can solve this second problem by preventing other users and processes from altering the data in the table in which we are working until we have turned the foreign key checks back on. We therefore need to construct a script that does the following.- Locks the customer table – lock table customers write;
- Turns off FK checks – set foreign_key_checks = 0;
- Alters the table to add the auto_increment feature to the PK field
- Turns FK checks back on – set foreign_key_checks = 1;
- Unlocks the customer table – unlock tables;
It is VERY important to consider that altering tables can require a bit of time for very large tables, and that while the table is locked, other users and processes cannot operate. Consequently, this kind of modification should not be done during peak operating hours in a production operation (as a student in a lab exercise, working on your own database, you may do this at any time) but ideally in hours during which the business does not normally operate. In cases where round-the-clock, high availability of a database is required, other approaches may be required. Addressing this problem in a high-availability, high-demand environment is an advanced topic, study of which is outside the scope of this course. Use the outline below to construct your script. Show all commands in your answer sheet along with the output of the commands.
1234567lock table customers write;set foreign_key_checks = 0;– Replace this comment with your ALTER TABLE command to add the auto_increment feature to the PK fieldset foreign_key_checks = 1;unlock tables;–statements to insert two rows into the table–verify auto_increment with a select statementLocks the customer table – lock table customers write;Turns off FK checks – set foreign_key_checks = 0;Alters the table to add the auto_increment feature to the PK field
- The Vice President of Marketing for your firm wants the firm’s sales representatives to be able to directly view and edit customer details, but only for the state to which a particular sales representative is assigned. You have suggested that this need can be addressed with a view. For example, a view could be created for one particular state, and user account permissions for accessing that view granted only to sales representatives from that state. The VP has asked you to quickly create a simple proof-of-concept demonstrating how this might work. Complete the following steps:
- Construct a view on the customers table called CA_CUSTOMERS that consists of all data about customers that live in California.
- Display the data using this view to verify that only customers that reside in California are visible.
- Prove that It is possible to add or update records through this view by updating the record for Karina Lacy to change the spelling of Karina’s last name to Lacie.
- Display the data using the customer table to verify that the change has been made.
Show all commands in your answer sheet along with the output of the commands.
- The Senior Customer Service Manager has requested the ability to create a report at any time that will show shipped orders that took some specified number of days to fulfill.
- Create a view named SHIPPING_TIME that lists only customer_first_name, customer_last_name, order_date, shipped_date, and the calculated field days_to_fulfill (use the DATEDIFF function) showing the number of days between when the customer placed the order and when it was shipped. Show the data from this view.
Now let’s do some queries by adding sorting and filters USING THIS VIEW, WITHOUT CHANGING IT. - Use the view to display the data sorted by highest to lowest days to ship
- Use the view to display only the orders that took less than 10 days to ship.
- Use the view to display only the orders that took more than 30 days to ship.
- Create a view named SHIPPING_TIME that lists only customer_first_name, customer_last_name, order_date, shipped_date, and the calculated field days_to_fulfill (use the DATEDIFF function) showing the number of days between when the customer placed the order and when it was shipped. Show the data from this view.
- Queries that require joins and aggregate functions can be easier to construct when using a view as a “temporary” table. Consider a report to show total sales by artist.
- First create a view called SalesData that displays the order_id, item_id, the calculated field ItemTotal (which is quantity times price), the title and artist_id.
- Display the data in the SalesData view sorted by artist_id. Does this help you to “visualize” how to group the data to create the totals?
- Create a query USING THIS VIEW and the appropriate aggregate function to display artist_id and the total sales for each artist.
- Now join to the artist table in order to display the artist_name along with the total sales.
- Now use this same method to display the total sales per customer.
- Create a view called SalesData with the appropriate data. At a minimum you will need customer_id and the calculated item total. DO NOT use the customer table in this view, it will be joined later.
- Display the data in your view sorted by customer_id. Does this help you to “visualize” how to group the data to create the totals?
- Create a query USING THIS VIEW and the appropriate aggregate function to display customer_id and the total sales for each customer.
- Now join to the customer table in order to display the customer_name as a single field named Customer along with the total sales. Sort the report by Total sales in descending order.
CIS 336 CIS336 CIS/336 ENTIRE COURSE HELP – DEVRY UNIVERSITY
CIS336 Lab 6 Group Functions and Subqueries
Lab 6 will introduce the concept of group functions and subqueries to meet more complex report requirements. This lab may be completed using either DeVry’s Omnymbus EDUPE-APP lab environment, or a local copy of the MySQL database running on your own computer using the OM database tables. The lab will utilize a set of tables that are represented by the ERD (OM_ERD.docx) and are created and populated by the script file (create_OM_db.sql). Follow the instructions in the file CreateOMTables.docx to create your database, tables, and data.
A few IMPORTANT things to note if using EDUPE MySQL:
**There can be NO SPACES in alias names given to a column. For example:
Select unit_price as “Retail Price “ from items; –this does NOT work in EDUPE MySQL.
Any of the following WILL WORK:
1 2 3 4 | Select unit_price as “RetailPrice” from items;Select unit_price as “Retail_Price” from items;Select unit_price as Retail_Price from items;Select unit_price as RetailPrice from items; |
**Any calculated fields MUST be given an alias (and note above NO SPACES in alias). For example:
select unit_price * 2 from items; –this does NOT work in EDUPE MySQL
This will work:
1 | select unit_price * 2 as NewPrice from items; |
Deliverables
Lab Report (Answer Sheet) containing both the student-created SQL command(s) for each exercise, and the output showing the results obtained. Be sure your name is on the file.
LAB STEPS: Complete each of the exercises below.
- Write a query to determine the total number of items on each order. Display the order_id and the total with a heading of TotalItems (note no spaces). Filter to only display information for order_id of 600 or higher.
- Re-do query 1 but filter to only show those orders with more than 2 items ordered. Sort by the number of items ordered, lowest to highest.
- The order_details table has a quantity for each item ordered. Show the total amount charged for each item on the order (quantity times price). Display order_id, the item id, the unit price, the quantity times price of the item labeled as “Itemtotal” (note NO spaces). Sort by order id and filter to only display those order ids between 400 and 700.
- Write a query to display the total amount for each order: show the order id and total. Sort by descending order on the total and only display orders with a total of $40 or more.
- Re-do query 4 but show the customer name for each order (formatted as a single field with heading of Customer) along with the city, order id and total. Filter to only display customers that live in California. Sort by city.
- Display the total amount of sales per item. Show title, total quantity sold with a heading of Quantity, total sales with a heading of “TotalSales” (not NO space). Sort by highest to lowest total.
- Display the total sales for each customer: show customer name (as single field) with a heading of Cutomer and total. Sort lowest to highest total. Filter to only display customers with $50 or more in total orders.
- Use subqueries to determine which (artist) had the item ordered in highest quantity on an order? First determine the highest quantity on any order, then determine the item number associated with it, then display the artist.
- Display the total sales by artist: show artist name, total. Sort highest to lowest.
- USE A SUBQUERY to Increase price of all items by ‘No Rest for the Weary’ by 10%. If working in MySQl you will need to disable safe mode. Show prices before and after. Rollback after.
- USE A SUBQUERY to display names of customers that have unshipped orders.
- Display the total amount of sales made to customers in NY
- USE A SUBQUERY to list the items (title and artist) of items that have never been ordered
- Show the order history for Samuel Jacobsen. Display the order id, order date, ship date, and total.
- Show the total amount of sales per sales rep. Display the employee name as a single field along with the total sales, sorted by highest to lowest sales.
CIS 336 CIS336 CIS/336 ENTIRE COURSE HELP – DEVRY UNIVERSITY
CIS336 Lab 5 Joining Tables
Lab 5 will introduce the concept of multi-table JOINS in order to work with data in two or more related tables simultaneously. This lab may be completed using either DeVry’s Omnymbus EDUPE-APP lab environment, or a local copy of the MySQL database running on your own computer using the OM database tables. The lab will utilize a set of tables that are represented by the ERD (OM_ERD.docx) and are created and populated by the script file (create_OM_db.sql). Follow the instructions in the file CreateOMTables.docx to create your database, tables, and data.
A few IMPORTANT things to note if using EDUPE MySQL:
**There can be NO SPACES in alias names given to a column. For example:
Select unit_price as “Retail Price “ from items; –this does NOT work in EDUPE MySQL.
Any of the following WILL WORK:
1 2 3 4 | Select unit_price as “RetailPrice” from items;Select unit_price as “Retail_Price” from items;Select unit_price as Retail_Price from items;Select unit_price as RetailPrice from items; |
**Any calculated fields MUST be given an alias (and note above NO SPACES in alias). For example:
1 2 3 | select unit_price * 2 from items; –this does NOT work in EDUPE MySQLThis will work:select unit_price * 2 as NewPrice from items; |
Deliverables
Lab Report (Answer Sheet) containing both the student-created SQL command(s) for each exercise, and the output showing the results obtained. Be sure your name is on the file.
LAB STEPS: Complete each of the exercises below:
- Use the JOIN ON syntax to write a query to display the order id, order date, customer name formatted as a single field (i.e. “Tom Jones”) with a heading of Customer, and customer_city for customers residing in the state of OHIO. Sort the output to display the newest orders first.
- Use the JOIN USING syntax to display the order_id, order date, and shipdate for orders to Karina Lacy that have shipped.
- Use the implicit join syntax (the WHERE clause) to display the last name, city, order date and ship date for all orders shipped in 2012.
- Use any join syntax EXCEPT NATURAL JOIN to list the customer_first_name and customer_last_name concatenated with an intervening space as Customer, customer city and state formatted as a single column in the format of “city, ST” with a heading of Location, order_id and order date for orders that have not shipped.
- List the customer name, order date, zipcode for any customer(s) placing an order for the item titled ‘Etcetera”.
- Write a query to list the title and artist of ONLY the items that have been ordered. Only list each title once.
- Write a query to list the title and price of all items that have been ordered by customer Millerton.
- Write a query to list the last name and order id of customers that ordered any items by the artist Burt Ruggles?
- Write a query to display a list of titles along with the artist name., sorted by artist name.
- Write a query to display an invoice for order 693 including the title, quanty, price, and a calculated column to display the line item subtotal (quantity times price) with a heading of Subtotal.
- Display the order id, last name, title , and quantity for any items where customers have ordered 2 or more of a particular item in an order.
- The employees table contains a list of employees of a company. An employee may be managed by another employee. To denote an employee’s manager, the employee_id of the manager is entered into the manager_id field of the employee reporting to that manager. In order to produce a list of which managers supervise which employees, the table may be joined to itself using these two attributes (employee_id, manager_id). This is known as a SELF-JOIN. Use a SELF-JOIN on the employees table to produce a result containing two columns: the concatenated last_name and first_name of the manager, and the concatenated last_name and first_name of the employee. Label the first-column supervisor, and the second-column employee. Order the output by the supervisor’s last_name and first_name.
- Write a query to display the order id, order date, ship date, and customer last name for all SHIPPED orders placed on the internet (no employee id). Show the most recently shipped orders first.
- Write a query that displays the order id, order date, and employee name as a single field labeled Employee for each order that an employee assisted with.
- Write a query that displays the order id, order date, customer name as a single field labeled Customer for all orders for the sales rep Thomas Hardy, sorted by customer last name.
CIS 336 CIS336 CIS/336 ENTIRE COURSE HELP – DEVRY UNIVERSITY
CIS336 Lab 4 Introduction to Select Insert Update and Delete Statements
Lab 4 will introduce the various aspects of the SQL select statement and the methods of retrieving data from the database tables. This lab will also introduce the fundamentals of updating and deleting records. This lab may be completed using either DeVry’s Omnymbus EDUPE-APP lab environment, or a local copy of the MySQL database running on your own computer using the OM database tables. The lab will utilize a set of tables that are represented by the ERD (OM_ERD.docx) and are created and populated by the script file (create_OM_db.sql). Follow the instructions in the file CreateOMTables.docx to create your database, tables, and data.
A few IMPORTANT things to note if using EDUPE MySQL:
**There can be NO SPACES in alias names given to a column. For example:
Select unit_price as “Retail Price “ from items; –this does NOT work in EDUPE MySQL.
Any of the following WILL WORK:
1 2 3 4 | Select unit_price as “RetailPrice” from items;Select unit_price as “Retail_Price” from items;Select unit_price as Retail_Price from items;Select unit_price as RetailPrice from items; |
**Any calculated fields MUST be given an alias (and note above NO SPACES in alias). For example:
1 | select unit_price * 2 from items; –this does NOT work in EDUPE MySQL |
This will work:
1 | select unit_price * 2 as NewPrice from items; |
Deliverables
Lab Report (Answer Sheet) containing both the student-created SQL command(s) for each exercise, and the output showing the results obtained. Be sure your name is on the file.
iLAB STEPS: Complete each of the exercises below.
- Write a query that displays a list of all customers showing the customer first name, last name, and phone number. Sort the results by customer last name, then first name.
- Write a query that displays each customer name as a single field in the format “firstname lastname” with a heading of Customer, along with their phone number with a heading of Phone. Use the IN operator to only display customers in New York, New Jersey, or Washington D.C. Sort the results by phone number.
- Write a query that will list all the cities that have customers with a heading of Cities. Only list each city once (no duplicates) and sort in descending alphabetical order.
- Write a query that displays the title of each item along with the price (with a heading of Original) and a calculated field reflecting the price with a 25% discount (with a heading of Sale). Display the sale price with two decimal places using the ROUND function. Sort by price from lowest to highest.
- Write a query that displays the customer_first_name, customer_last_name, and customer_city from the customers table. Use the LIKE operator to only display customers that reside in any zipcode beginning with 4.
- Write a query that displays the order id and order date for any orders placed from March 1, 2014 through April 30, 2014. Do this WITHOUT using the BETWEEN clause. Format the date field as Month dd, yyyy and use a heading of “Ordered”.
- Write a query that displays the order id and order date for any orders placed during the month of May, 2014. Do this using the BETWEEN clause. Format the date field as mm/dd/yy and use a heading of “Ordered”.
- Write a query which displays the order id, customer id, and the number of days between the order date and the ship date (use the DATEDIFF function). Name this column “Days” and sort by highest to lowest number of days. Only display orders where this result is 15 days or more.
- Write a query which displays the order id, customer id and order date for all orders that have NOT been shipped, sorted by order date with the most recent order at the top.
- The Marketing Department has requested a new report of shipped orders for which the order was placed on either a Saturday or a Sunday. Write a query which displays the order id, order date, shipped date, along with a calculated column labeled “Order_Day” showing the day of the week the order was placed (use the DAYNAME function). Only display orders that have shipped and were placed on a Saturday or Sunday. Sort by order date with most recent orders at the top.
- Write a query to display the customer last name, phone number, and fax number but only display those customers that have a fax number.
- Create a statement to insert a new record into the items table with the following values:
item_id: 11
title: Ode To My ERD
Artist_id: 15
unit_price: 12.95
Show your INSERT statement along with the results of the following SELECT query to verify that the insert worked correctly.
select * from items where item_id > 10; - Create a statement to update the record inserted in the previous step to change the unit
price of this item to 7.95.
item_id: 11
title: Ode To My ERD
artist: 15
unit_price: 7.95
Show your UPDATE statement along with the results of the following SELECT query to verify that the insert worked correctly.
select * from items where item_id > 10; - Create a statement to delete the entire record that was inserted and then updated in the previous steps.
Show your DELETE statement along with the results of the following SELECT query to verify that the insert worked correctly.
select * from items where item_id > 10; - Using the SUBSTRING and CONCAT functions, write a query to display each customer name as a single field in the format “Jones, Tom” with a heading of Customer along with the customer_phone field in a nicely formatted calculated column named Phone. For example, a record containing the customer_phone value 6145535443 would be output with parentheses, spaces, and hyphens, like this: (614) 555-5443. Sort by last name.
CIS 336 CIS336 CIS/336 ENTIRE COURSE HELP – DEVRY UNIVERSITY
CIS336 Lab 3 Building the Physical
The lab for this week addresses taking a logical database design (data model) and transforming it into a
physical model (tables, constraints, and relationships). As part of the lab, you will need to download the zip file titled CIS336Lab3Files from Doc Sharing. This zip file contains the ERD, Data Dictionary, and test data for the tables you create as you complete this exercise.
Your job will be to use the ERD Diagram found below as a guide to define the table structures and constraints using both CREATE TABLE and ALTER TABLE statements. Once this has been done, you will need to write the INSERT INTO TABLE statements to insert the data provided into the table. The data should verify that the constraints you have created are valid and define the correct referential and data integrity constraints asked for. Lastly, you will write SELECT statements to query the tables and verify the data was populated. Please use exactly the data provided, without addition, deletion, or alteration except as directed, as your results may be evaluated against expected results generated using this exact data set.
Narrative/Case Study
For this lab, you will be creating SQL statements to build a series of relational tables, using SQL CREATE statements in a script file format for the Student Database. You will then populate those tables through the use of INSERT statements with sample data.
You will need to create a script file and name it YourName_Lab3.txt containing the following code.
- The drop table statements listed later in the specifications of this lab.
- The CREATE TABLE statements required to build the six tables.
- The INSERT statements necessary to insert all of the sample data.
- Six select statements to verify that the data is in the tables and accessible.
To help you accomplish this task successfully, you are being supplied with the ERD Diagram which follows, and the exact data to be inserted into each table, which may be found via the Doc Sharing tab on the course website.
The following guidelines are being provided to help assist you in creating your script file. Use the names for the tables and columns as listed in the ERD. Do not change them as it will affect your grade.
Creating Constraints
- Create all NOT NULL constraints as indicated in the ERD.
- Create all PK constraints as indicated in the ERD.
- Create all FK constraints as indicated in the ERD.
Create all of the tables and all of the constraints before populating any of the tables with data. Because FK constraints will be in place when the insert statements are executed, you will need to consider carefully which tables must be created before others in order to ensure that FK constraints are not violated.
The COURSE table has a self-referencing FK constraint. Specifically, some courses have prerequisite courses. Consequently, the record for a course possessing a prerequisite course cannot be successfully inserted into the table unless the record for the prerequisite course has already been inserted. This may require you to reorder the insert statements to resolve FK violations when loading the table. You may reorder the data provided for this table, but do not alter it.
The data for one table intentionally contains a record containing an FK constraint that is not resolved by a record in the parent table. This orphaned record has been included as an exercise for you to find. Because this record has an unreconciled FK constraint, it cannot be successfully inserted. You will need to delete or comment out the insert statement for this one record in order to produce a script that runs without errors.
Aside from reordering the data for the COURSE table as necessary, and commenting out/deleting the ONE record whose FK dependency cannot be resolved by the data provided, you are NOT to modify, add to, or delete from the data provided. Your SQL script must produce tables containing data identical to the expected solution set, or points will be deducted.
ALL character strings must be enclosed in single quotes. This includes alpha strings and alphanumeric (remember that any formatting within a numeric string makes it alphanumeric). If you are inserting a NULL, do not enclose the word NULL in single quotes, as this will insert the word NULL into the row. To insert a null you simply use the word NULL.
Deliverables
The deliverable for this lab will include the following documents.
- Your script file. Create this file in Notepad, or another PURE TEXT editor—NOT Word. Make sure your name is in a comment area at the top of the script file. Use a double dash to create a one line comment.
- Your script file must execute without error. It is recommended that you begin early in the week, and post any questions to the Q & A discussion in order to produce a working script by the due date. Be sure your name is on all documents and that all documents have been included in a single zip file for this week’s assignments. Refer to the following ERD in constructing your solution.
Student
PKStudent_ID
Salutation
First_Name
Last_Name
Street_Address
Phone
Employer
Registration_Date
FK1Zip
Enrollment
PK,FK1Section_ID
PK,FK2Student_ID
Enroll_Date
Final_Grade
iLAB STEPS
STEP 1: The DROP Statements
A DROP TABLE statement must appear in your script file, prior to the SQL statements for creating the table in question. This will allow you to run and re-run your script file as often as you need to. The
very first time you run your script the table does not exist, so the IF EXISTS clause causes the statement to be ignored. Thereafter, the table will be deleted, ensuring that your CREATE TABLE statement creates the table fresh and clean, with only the attributes present in the current revision of the CREATE
statement. Here is an example of one of the six DROP TABLE statements you will need to create.
1 | DROP TABLE IF EXISTS `ENROLLMENT` ; |
STEP 2: The CREATE TABLE Statements
Next, define the CREATE TABLE statements for the six tables that you are to create based upon the ERD (provided above) for this lab. Be sure to follow the guidelines given above on how and where to create the different types of constraints for each table. This will include PK, FK, and NOT NULL constraints.
STEP 3: The INSERT Statements for the Data
The third step is to create the insert statements to insert the sample data into the tables created in
Step 2. The data for each table is contained in text files, named for the table whose data it contains.
Modify the format of the data (e.g., date formats and add or eliminate quote marks) as needed to craft
your insert statements, but do not change the inherent value of the data.
STEP 4: The SELECT Statements
The next step of the lab will be to create the select statements to verify the data was inserted correctly. You should have six select statements; one for each table. The command is SELECT * FROM Table_Name;
For example, to select all columns from the Student table, the command would be SELECT * FROM student;
Be sure to save all of the above statements in your script file.
STEP 5: Testing and Verifying Your Script
Now we come to the point of verifying that your script file works by creating all of the tables and
inserting and selecting all of the data. Your script should execute without errors, and select the entire
contents of each table in turn. Inspect your query results to ensure that each column and row from each of the tables is as expected. Correct and repeat testing of your script until no errors occur, and the
results match expectations. You may also use the DESCRIBE command to display the table structure of each table, and verify that PK and NULL constraints have been properly created. The SHOW CREATE TABLE statement is useful for displaying the SQL that would regenerate a given table, which is a useful way for checking that FKs have been properly created.
Examples:
1 2 3 | DESCRIBE STUDENT;SHOW CREATE TABLE STUDENT;This is the end of Lab 3 |
CIS 336 CIS336 CIS/336 ENTIRE COURSE HELP – DEVRY UNIVERSITY
CIS336 Lab 2 The Expanded Entity Relationship Diagram
This lab introduces the next step in creating a data model, the Entity Relationship Diagram (ERD). You will be given a business scenario for a University Medical Center, which is a small community hospital. The business specifications will outline a number of things about the business, some of which will apply directly to the database you are being asked to model. There is a table that lists the entities (tables) that will be needed for the database and related attributes (columns) for each entity. There is also a column that lists specific information about the entity that will be helpful in determining its relationship to other entities within the model.
Be sure to include the minimum and maximum occurrences of each relationship (cardinality) and to supply a name to the relationship that will work in both directions. Make sure to use Crow’s Feet notation in your ERD.
Narrative/Case Study
The University Medical Center is a small, community hospital. A new hospital administrator has recently been hired by the Board of Directors, and directed to right-size patient care and pharmacy services and improve profitability. The hospital operates three clinical facilities: the main hospital, a mid-town clinic, and an Urgent Care location. The hospital also offers selected in-home care services. Many of the patients are repeat or regular patients who receive regular treatment for various conditions, and many utilize the hospital’s pharmacy services for prescription medications.
The pharmacy dispenses about 3,000 different prescription medications of various kinds. Every prescription is associated with one patient, and is logged by the dispensing clinic. The new administrator wants to know which drugs are most prescribed, and also which are the most profitable.
The following is some general information about the organization and its current processes.
- The hospital operates three clinical facilities.
- A healthcare worker logs in at a facility at the start of a shift and logs out at the end.
- The name, address, Social Security number and other information is recorded for every healthcare worker.
- All healthcare workers have one billing rate, which is determined by their job description.
- Each medication dispensed by prescription is linked to both the prescription number and the medication ID number, recording the item price and the quantity dispensed.
As a convenient and affordable means of providing hospice care, palliative care, and convalescent care to patients that need occasional/intermittent skilled nursing, but do not require hospitalization, the hospital offers limited in-home care. Recording of in-home care includes the healthcare worker ID, their departure time and return time, and also the prescription ID for any prescriptions administered by the healthcare worker in the home setting.
The hospital administrator would like to know what home-care visits have been made to whom, by whom, when, and how long they took. There is concern at this point that the cost of providing limited home healthcare is not providing adequate return on investment, and the program should be revised or discontinued.
Requirements
You have been asked to develop a logical data model for University Medical Center based on the information given to you by the new hospital administrator and their staff. Through analysis of the nouns and verbs in the case study above, you have accumulated the following entity, attribute, and relationship information shown in the table below. The attribute list may not be complete. If you determine that additional attributes are needed to better define an entity, then you should add them.
Entities Attributes and Relationships for University Medical Center (Parallel Lab Exercise):
Entity Attributes Relationships:
HealthcareWorker HealthcareWorkerID, LastName, FirstName, SSN, Address, City, State, Zip, Phone Number, HealthcareWorkerTypeID A healthcare worker can belong to any one of the three job categories, but can belong to one and only one of the three. healthcare worker has names and other contact information.
HealthcareWorkerType HealthcareWorkerTypeID, HealthcareWorkerTypeDesc, HourlyBillingRate A healthcare worker can be either a physician (diagnoses, prescribes medication), nurse (provides physician-ordered treatments, administers medications), or a pharmacist (dispenses, delivers medication).
ClinicLog ClinicLogID, ClinicID, Login, Logout, HealthcareWorkerID Patients may be treated by a healthcare worker at a clinic and can be tracked by the clinic log number. A healthcare worker must sign into the clinic before he or she can serve patients, and must sign out when finished treating patients at that clinic. A healthcare worker may serve portions of a shift at more than one clinic.
Clinic ClinicID, ClinicLocationDesc, AMAAccredNum The hospital operates three clinical facilities: General Hospital, Midtown Clinic, and Urgent Care.
InHomeCare InHomeCareID, HealthcareWorkerID, PrescriptionID, DepartTime, ReturnTime. Relates to both the healthcare worker and the prescription entities. This entity will help track provision of home healthcare. A healthcare worker can provide many home visits but a prescription is administered on a home visit by one and only one healthcare worker.
Method MethodID, Method Description Relates to medication and identifies the method of administration, for example, oral, injection, and so on.
Medication MedicationID, MedicationName, Dosage, Cost, QuantityOnHand, LastPurchasedDate, ReorderMinimum Identifies the medication the hospital pharmacy dispenses. One or more medications can be dispensed per prescription. The quantity on hand allows Pharmacists to determine the inventory levels. The reorder minimum can be used to determine when the inventory level has reached a reorder point.
Prescription PrescriptionID, MedicationID, BillingAmount, TransactionDateTime, ClinicLogID, PatientID A prescription is identified by a single prescription order. Prescriptions are
- made to one or more patients but only one patient at a time;
- made by one or more pharmacists but only one pharmacist per prescription;
- recorded on one or more clinics but only one clinic per prescription; and
- administered by one or more nurses but no one prescription can be administered by more than one nurse.
PrescribedMedication PrescriptionID, MedicationID, ItemPrice, QuantityDispensed Prescribed medication is part of a prescription and records medication dispensed per prescription. Prescribed medication must be able to associate multiple medications sold on a single prescription number.
Patient Patient Number, First Name, Last Name, Address, City, State, Zip, Phone Number A patient can be associated with multiple prescriptions, but any one prescription is to one and only one patient. A prescription can occur without a patient registering in the system (e.g., an unconscious patent arrives by ambulance in the emergency room and receives life-saving emergency treatment).
Using an appropriate drawing/data modelling tool, develop an ERD that meets the following guidelines.
- Draw the entities with their attributes.
- Indicate the relationships between the entities using Crow’s Foot notation. You will need to determine the cardinality and optionality for each direction of the relationships. Some of the Foreign Key relationships are identified in the graph above but not all. Be sure you identify and account for all Foreign Key relationships.
- Add a name (in both directions) to the relationships. Remember, if you can verbalize the relationship in both directions, then you probably have a valid relationship.
Deliverables
The deliverable for this lab will be your completed ERD as a single MS Word document using copy/paste or imported as an image from your drawing/modelling application, cropped and sized appropriately (it should fit on a single page), and named lab2_solutions_yourname.
iLAB STEPS
STEP 1: Drawing Entities and Attributes
Be sure to include all of the entities that have been defined. You need to include at least the primary and foreign key attributes where applicable in your diagram.
STEP 2: Add Relationships
Be sure that you link all entities based on PK to FK relationships. There may be a case where you need to identify a combination PK and if so make sure that all of the relationships involved are defined. Be sure that you have set your drawing/modelling tool set to show Crow’s Foot notation. Also, be sure that you are defining the correct cardinality for the relationships.
STEP 3: Naming of relationships
If your drawing/modelling tool creates a default name for relationships, do not simply accept this default without due consideration. There may be some relationships where the default is applicable, but in most cases you will want to explicitly name the relationship. Be sure that you have provided a verb phrase for both directions in the relationship.
CIS 336 CIS336 CIS/336 ENTIRE COURSE HELP – DEVRY UNIVERSITY
CIS336 Lab 1 Normal Forms and Entity Relationship Diagrams
In this exercise, you will analyze a de-normalized data set presented in the form of a spreadsheet. You will next construct a series of dependency diagrams, transforming the evolving data model from First Normal Form (1NF), to Second Normal Form (2NF), and finally to Third Normal Form (3NF). When the model has reached 3NF, you will construct the Entity Relationship Diagram (ERD) depicting the logical design of the database. Your ERD will use Crow’s Foot notation to denote the relationships between tables.
Sample Exercise, With Solution.
Before completing your lab, please review this example problem. The diagram below is a partial depiction of a business spreadsheet for a retail store operation. The store sells books. Books have a 13-digit International Standard Book Number (ISBN), a title, a publisher, and a unit price. Invoices track sales of books. An Invoice contains one or many line items, with each line item reflecting the sale of one or more copies of a specific book. Every publisher has a company name, and a publisher code.
[table]
InvNum, ISBN13, InvDate, BookTitle, PubCode, PubName, Qty, unitPrice
1022, 9781291940336, 2015-03-09, MYSQL Functions ,1001 ,Lulu.com ,3, 4.99
1022, 9780321833877, 2015-03-09, MySQL Fifth Edition, 1029, Addison-Wesley, 5, 33.95
1022 ,9781890774820 ,2015-03-09 ,Murach’s MySQL 2nd Edition ,1032, “Murach, Mike & Associates Inc”, 2, 48.95
1249, 9781449374020, 2015-02-22, MySQL Cookbook: Solutions for Database Developers and Administrators ,1118, O’Reilly Media Incorporated, 9, 50.59
1249, 9781449325572, 2015-02-22, PHP & MySQL: The Missing Manual, 1118, “O’Reilly Media, Incorporated”, 6, 29.95
1249, 9781890774790, 2015-02-22, Murach’s PHP and MySQL 2nd Edition, 1032, “Murach, Mike & Associates Inc”, 1, 48.95
[/table]
BookSales
- Using the BookSales table structure shown above, draw the dependency diagram, and show all dependencies, full, partial, and transitive.
Discussion: A composite primary key consisting of InvNum + ISBN13 can be constructed, ensuring that all rows are unique. All remaining attributes are shown to be dependent (at least partially) on this composite key, so the table is 1NF. Further analysis shows that InvDate is dependent on only part of the key (InvNum), and that unitPrice, PubCode, and BookTitle also depend on part of the key (ISBN13). A transitive relationship is also revealed: PubName truly depends on PubCode, which in turn depends on ISBN13. - Using the answer to exercise 1, remove all partial dependencies and draw the new dependency diagrams. For each new table created, specify its normal form (1NF, 2NF, 3NF).
Discussion: To achieve 2NF, we must remove partial dependencies. This is done by decomposing into three tables, and three dependency diagrams at this stage. Notice that the Transitive relationship has not yet been addressed.
- Using the BookSales table structure shown above, draw the dependency diagram, and show all dependencies, full, partial, and transitive.
- Using the answer to exercise 3, remove all transitive dependencies, and draw the new dependency diagrams. For each new or revised table, specify its normal form.
Discussion: The transitive relationship has been removed by creating the Publishers table, in which PubName is fully dependent upon PubCode. Pubcode also persists as a dependent attribute and Foreign Key in Books. All tables are now in 3NF, and have been given meaningful names reflecting the entities they represent. LINEITEMS represents the collection of line items for all invoices. Invoices represents the collection of Invoices for all customer orders. Books makes up the list of all books available for sale (whether they have ever been ordered or not). Each book has a publisher, and the publisher code and Name reside in the Publishers table. - Draw the ERD for exercise 3, using Crow’s Foot notation.
Student Exercise
The student exercise for this lab is similar to the sample exercise presented above.
Consider the following spreadsheet containing information about customers, their shipping and billing addresses, and the countries corresponding to each of those addresses. A customer may be associated with zero to many addresses. A customer may have 0 or 1 default billing address. A customer may have 0 or 1 default shipping address. Each address may be associated with 0 or 1 countries, while each country may be associated with 0 to many addresses.
[table]
cust_id, fname, lname, def_bill_addr_id, def_ship_addr_id, addr_id, street_addr, city, state, zip, country_code, country_name
202, John, Smith, 1096, 2039, 1096, 123 Happy Ave., Orlando, FL, 32801, 76, United States
202, John, Smith, 1096, 2039, 2039, 2024 Shorline Dr., Seattle, WA, 98101, 76, United States
202, John, Smith, 1096, 2039, 8053, 100 N. Kent Ave. St., James, WA, 54364, 34, Jamaica
175, Hilda, Yeager, 2172, 2172, 3879, 48 Spatzel Ct., Dusseldorf, DD, 5111, 29, Germany
175, Hilda, Yeager, 2172, 2172, 3921, 162 Rue Moritz, Paris, PR, 75001, 28, France
321, Siri, Apple, 1881, 1881, 1881, 1 Infinite Loop, Cupertino, CA, 95014, 76, United States
[/table]
Using the example solution as a guide, perform the following steps:
- Using the CustomerAddressCountry spreadsheet show above, draw the dependency diagram, and show all dependencies, full, partial, and transitive. Paste your solution into the answer sheet, and label it, Answer #1.
- Using the answer to exercise 1, remove all partial dependencies and draw the new dependency diagrams. For each new table created, specify its normal form (1NF, 2NF, 3NF). Paste your solution into the answer sheet, and label it, Answer #2.
- Using the answer to exercise 3, remove all transitive dependencies, and draw the new dependency diagrams. For each new or revised table, specify its normal form. Paste your solution into the answer sheet, and label it, Answer #3.
- Draw the ERD for exercise 3, using Crow’s Foot notation. Paste your solution into the answer sheet, and label it, Answer #4.