Full course New Solution CIS 363A ENTIRE COURSE HELP – DEVRY UNIVERSITY
$47.99$59.00
CIS 363A CIS363A CIS/363A ENTIRE COURSE HELP – DEVRY UNIVERSITY
CIS363A Entire Course
CIS363A Entire Course includes:
- CIS363A Lab 1 Create an Online Resume
- CIS363A Lab 2 Create a Website Using Dreamweaver
- CIS363A Lab 3 Create a Web Page Using CSS
- CIS363A Lab 4 Create a Website with Slideshow
- CIS363A Lab 5 HTML Form with Validation and Proper Designing
- CIS363A Lab 6 JavaScript For New Year’s Eve
Description
CIS 363A CIS363A CIS/363A ENTIRE COURSE HELP – DEVRY UNIVERSITY
COURSE DESCRIPTION: CIS 363A Web Interface Design with Lab
CIS 363A Web Interface Design using Dreamweaver software and this course also uses HTML5 and CSS.
CIS363A Entire Course
CIS363A Entire Course includes:
- CIS 363A Lab 1 Create an Online Resume
- CIS 363A Lab 2 Create a Website Using Dreamweaver
- CIS 363A Lab 3 Create a Web Page Using CSS
- CIS 363A Lab 4 Create a Website with Slideshow
- CIS 363A Lab 5 HTML Form with Validation and Proper Designing
- CIS 363A Lab 6 JavaScript For New Year’s Eve
CIS 363A CIS363A CIS/363A ENTIRE COURSE HELP – DEVRY UNIVERSITY
CIS 363A Lab 6 JavaScript For New Year’s Eve
Elegance Entertainment has a website that promotes their annual New Year’s Eve party. This site is required to display the current date and the number of days until New Year’s Eve. The nyeProblem.htm file is missing Javascript. Download the iLab 6 folder with this file in it. You must add this code such that the following will be displayed on Elegance’s Web page:
iLAB STEPS
STEP 1: Add library.js
Add the script code that will import the javascript file library.js.
STEP 2: Variables And Values
Declare the following variables and assign the following values:
Today = today’s date
ThisDay = the current day
ThisMonth = the current month
ThisYear = the current year
DaysLeft = Return value for NYEDays function in libary.js. Sends Today as argument.
MonthTxt array with first location = “” and remaining locations storing months “January”, “February”, and so forth.
CIS 363A STEP 3: Decision And Output
Display today’s date. Add a decision statement that displays the number of days left to New Year’s Eve or a message that says, “IT’S NEW YEARS EVE!”
CIS 363A STEP 4: iLab Submission
- Once you have made the changes above, change the name of the folder to CIS363A_YourLastName_W6_Lab.
- Right-click on the folder and select Send To -> Compressed (zipped) Folder. You can also use other tools to compress the files into a single zip folder (e.g., 7-zip).
- Upload the zip file to the Week 6 iLab DropBox, located at the top of this page.
Submit your lab to the Dropbox, located at the top of this page. For instructions on how to use the Dropbox, read these step-by-step instructions or watch this TutorialDropbox Tutorial.
See the Syllabus section “Due Dates for Assignments & Exams” for due date information. CIS 363A
Deliverables
[table]
Step Deliverable/Components, Points
Step 1 – Add Javascript source library.js, 5
Step 2 – Add Javascript variables and array and assign values, 15
Step 3 – Add the correct decision and output statements, 20
Total, 40
[/table]
- CIS 363A Lab 1 Create an Online Resume
- CIS 363A Lab 2 Create a Website Using Dreamweaver
- CIS 363A Lab 3 Create a Web Page Using CSS
- CIS 363A Lab 4 Create a Website with Slideshow
- CIS 363A Lab 5 HTML Form with Validation and Proper Designing
- CIS 363A Lab 6 JavaScript For New Year’s Eve
CIS 363A CIS363A CIS/363A ENTIRE COURSE HELP – DEVRY UNIVERSITY
CIS 363A Lab 5 HTML Form with Validation and Proper Designing
This lab supports TCO 6: Given a project, develop an online form that uses client-side form validation.
You have been asked to design and implement a checkout form. Imagine that a user has been navigating an online store that sells a variety of sports equipment. The user has added a number of items to his or her shopping cart and is going through the checkout process to order the items online. The checkout page shows what the user bought and allows him or her to enter his or her information (name, address, credit card number, etc.) to complete the order. You are going to design this checkout form. CIS 363A
CIS 363A iLAB STEPS
Step 1: Create Web Page in Dreamweaver
Using what you learned in Weeks 1 to 4, create a web page that includes the following.
- A title for the online store—you make one up!
- A subtitle that says “Complete Your Order”
- The items that the user ordered
- One kayak with rudder for $775.00
- One 10 L dry bag for $15.00
- Two helmets for $50.00 each
- The total cost for the order
Feel free to add a layout, style, color, and graphics to the page as you see fit.
CIS 363A Step 2: Add an HTML Form to the Page
- The page must include a way for the user to enter his or her
- name;
- address (street, city, state/province, country);
- phone number;
- e-mail address;
- preference for shipping or picking up the order;
- credit card type (one of Visa, MasterCard, or American Express); and
- credit card number.
- There must also be a button to complete the order.
- You should choose the appropriate form element for each input. For example, a textbox should be used for “name.”
Create a simple HTML page with a heading level 1 that says “Thank You!” Save this as thanks.html.
Note: If this page was part of a real store, we would set the form action to a server script to handle the order. However, for the purpose of this lab, please set the form action to thanks.html. When a valid form is completed, the form will redirect to this page.
Step 3: Add Unobtrusive Validation to the HTML Form
Include unobtrusive validation to the form. You must ensure that
- name and address are not blank;
- one of the ship or pick-up options is selected;
- a credit card type is selected; and
- a credit card number is not blank.
If the form does not validate, notify the user and do not allow the form to submit.
CIS 363A Step 4: iLab Submission
- Create a folder called CIS363A_YourLastName_W5_Lab.
- Put copies of each required deliverable into the new folder.
- Right-click on the folder and select Send To -> Compressed (zipped) Folder. You can also use other tools to compress the files into a single zip folder (e.g., 7-zip).
- Upload the zip file to the Week 5 iLab DropBox located on the silver tab at the top of this page.
Submit your lab to the Dropbox located on the silver tab at the top of this page. For instructions on how to use the Dropbox, read these step-by-step instructions or watch this Tutorial Dropbox Tutorial. CIS 363A
[table]
Step Deliverable/Components, Points
“Step 1~~- Includes all of the required elements: title, subtitle, table of items (5 points)~~- Design, layout, CSS (5 points)”, 10
“Step 2~~- Includes all of the required form elements: name, address, e-mail address, ship or pick-up, credit card type and number (10 points)”~~- Choose appropriate controls for the input (5 points)~~- Set form tag correctly (5 points), 20
Step 3~~- Validation of the required elements (5 points)~~- Unobtrusive validation used (3 points)~~- Prevent from submission on invalid data (2 points)~~- Transfers to thanks.html on valid submission, 10
Total, 40
[/table]
- CIS 363A Lab 1 Create an Online Resume
- CIS 363A Lab 2 Create a Website Using Dreamweaver
- CIS 363A Lab 3 Create a Web Page Using CSS
- CIS 363A Lab 4 Create a Website with Slideshow
- CIS 363A Lab 5 HTML Form with Validation and Proper Designing
- CIS 363A Lab 6 JavaScript For New Year’s Eve
CIS 363A CIS363A CIS/363A ENTIRE COURSE HELP – DEVRY UNIVERSITY
CIS 363A Lab 4 Create a Website with Slideshow
CIS 363A iLAB OVERVIEW
Scenario and Summary
This lab supports the following TCOs.
TCO 5—Given a web page that requires images and advanced styles, create and edit graphics and incorporate them into the page.
TCO 10—Given a project, create a website that contains text, links, images, and any other content necessary to complete the website using HTML and external CSS.
- Obtain 10 original photos.
- Research on the Internet and find some code that will allow you to create a slideshow.
- Create a page with your photos and the code you find.
- Create a Word document showing the source for your slideshow code. Make sure to document your HTML code also.
CIS 363A iLAB STEPS
Step 1: Get Photos
Find 10 photos.
- The photos can be obtained through http://quest.eb.com.proxy.devry.edu/ or from http://commons.wikimedia.org.
- If you have personal images that you wish to use for the assignment, be sure that you cite them correctly according to APA guidelines.
- All of the images you use should be cited in the sources document that accompanies this assignment.
- IMPORTANT! Make sure that the version of each image you use for the slideshow is less than 500K. Ten images at 500K is 5 MB, and adding the document should total no more than 7 MB.
CIS 363A Step 2: Research Slideshow Code
Do some research on the Web to find code that will let you take your photos and build a slideshow on a page. Try to find code that is CSS based and doesn’t require a lot of JavaScript.
One example is http://coding.smashingmagazine.com/2012/04/25/pure-css3-cycling-slideshow/.
CIS 363A Step 3: Build Page and Document Sources
- Create the slideshow according to your selected research, using the images you located in Step 1.
- The slideshow should run automatically and should contain a text-based title for each slide.
- Write a description of the process that the slideshow uses to cycle through the slides, and cite the source of your code.
CIS 363A Step 4: iLab Submission
- Create a folder called CIS363A_YourLastName_W4_Lab.
- Put copies of each required deliverable into the new folder.
- Right-click on the folder and select Send To -> Compressed (zipped) Folder. You can also use other tools to compress the files into a single zip folder (e.g., 7-zip).
Submit your lab to the Dropbox located on the silver tab at the top of this page. For instructions on how to use the Dropbox, read these step-by-step instructions or watch this Tutorial Dropbox Tutorial.
See the Syllabus section “Due Dates for Assignments & Exams” for due date information.
[table]
Deliverable, Points
Word document with sources, 10
Completed web page with slideshow, 15
Any other files necessary for the slideshow to work, 5
Total, 30
[/table]
- CIS 363A Lab 1 Create an Online Resume
- CIS 363A Lab 2 Create a Website Using Dreamweaver
- CIS 363A Lab 3 Create a Web Page Using CSS
- CIS 363A Lab 4 Create a Website with Slideshow
- CIS 363A Lab 5 HTML Form with Validation and Proper Designing
- CIS 363A Lab 6 JavaScript For New Year’s Eve
CIS 363A CIS363A CIS/363A ENTIRE COURSE HELP – DEVRY UNIVERSITY
CIS 363A Lab 3 Create a Web Page Using CSS
A local recruiter wants you to make a Web page for his information technology staffing company. He wants a Web page that has informed recent graduates about careers as Web programmers and Web designers. Create a Web page that will give information about each of the positions mentioned. The page content should be as followed:
- Descriptions about each of the positions
- Skills and/or education required for these positions
- Salaries, benefits associated with these positions
- Professional organizations of which people who hold these positions are typical members
- This page must have at least five graphical elements. You must implement the following CSS features:
- Box Model
- Floating Elements
- Borders
CIS 363A Remember that the recruiter wants this page to be well organized, informative, and attractive. Use colors and great graphics to make this Web page interesting so that he can attract more business.
Note!Software Citation Requirements
This course uses open-source software which must be cited when used for any student work. Citation requirements are on the Open Source Applications page.
Please review the installation instruction files to complete your assignment
CIS 363A iLAB STEPS
CIS 363A STEP 1: Gather Web Content
- Create written Web content about each of the positions.
- Gather all images that you will use.
CIS 363A STEP 2: Create Your Web Page
- Create an informal page layout for the Web page.
- Create the Web page based on criteria mentioned.
CIS 363A STEP 3: Submit Your Assignment
Upon completion of this step, upload your site to the Web server and attach a copy of the zipped folder to the Dropbox.
Submit your lab to the Dropbox, located at the top of this page. For instructions on how to use the Dropbox, read these step-by-step instructions or watch this Tutorial Dropbox Tutorial.
CIS 363A Deliverables
Submit a Week 3 Lab folder, including
- The HTML Web page
- Associated CSS files
- Images and multimedia (if any)
[table]
Category, Points
“Use of Box Model, bordering, and floating elements”, 15
“Completed Web page based on project specifications”, 15
“Correct External CSS file that attaches to each page”, 10
Total, 40
[/table]
- CIS 363A Lab 1 Create an Online Resume
- CIS 363A Lab 2 Create a Website Using Dreamweaver
- CIS 363A Lab 3 Create a Web Page Using CSS
- CIS 363A Lab 4 Create a Website with Slideshow
- CIS 363A Lab 5 HTML Form with Validation and Proper Designing
- CIS 363A Lab 6 JavaScript For New Year’s Eve
CIS 363A CIS363A CIS/363A ENTIRE COURSE HELP – DEVRY UNIVERSITY
CIS 363A Lab 2 Create a Website Using Dreamweaver
iLAB OVERVIEW
Scenario and Summary
Review a data file given by a client, and determine the number and type of pages needed. Create a storyboard depicting each page and the relationship to the other pages. Choose a template as instructed, alter the styles to fit the client’s logo, and produce several pages based on the design. Populate the new pages with the appropriate data from the data sheet.
In this exercise, you will choose a Dreamweaver template file and modify the styles according to the instructions below.
CIS 363A iLAB STEPS
Step 1: Storyboard the Site
- Review the MS Word document downloaded from the scenario and summary above.
- Determine what pages will be necessary for the site based on the provided document.
- Create a storyboard to show those pages as they relate to each other.
CIS 363A Step 2: Select and Save a Template
- Open Dreamweaver and reestablish your local site, if necessary. Do not attempt exercises without declaring a site.
- Create a new folder named w2Lab in the site root.
- From the menu, select File → New.
- In the selection window, choose blank page, page type: HTML, and Layout: 3 column fixed, header and footer. Choose doc type: HTML5 and layout CSS: create new file. Once you have made these selections, click Create.
- Save the CSS file in the w2Lab folder. Accept the default filename.
- Save the file as index.html in the w2Lab folder.
CIS 363A Step 3: Prepare the Resources
- Download this graphic and save it in your w2Lab folder.
- Place the image in the logo placeholder on the template page.
- Select the image placeholder in design view on the page.
- In the property inspector, drag the compass icon to the image in the w2Lab folder from the Src value box.
- In the Alt value box, type Rainbow Daycare Logo.
- Save the file.
CIS 363A Step 4: Create Links
- On the left side of the template file, there are four links representing a simple navigation menu.
- Link one—change to About Us
- Link two—change to Our Staff
- Link three—change to Contact Us
- Link four—change to Our Rates
- Select each link (the text) individually, and type in the file name that it will link to in the Link value box in the property inspector.
- About Us → about.html
- Our Staff → staff.html
- Contact Us → contact.html
- Our Rates → rates.html
- Save the file.
- CIS 363A Lab 1 Create an Online Resume,
- CIS 363A Lab 2 Create a Website Using Dreamweaver,
- CIS 363A Lab 3 Create a Web Page Using CSS,
- CIS 363A Lab 4 Create a Website with Slideshow,
- CIS 363A Lab 5 HTML Form with Validation and Proper Designing,
- CIS 363A Lab 6 JavaScript For New Year’s Eve
CIS 363A Step 5: Add Static Information
- Below the navigation menu are paragraphs describing the nature of the links. Delete all of the text in this column.
- Type Phone and press Enter.
- Copy and paste the phone numbers from the document to the column. Between the two phone numbers, place a line break by setting your insertion point between the numbers and pressing Shift + Enter.
- Highlight the word phone and format it as Heading 4.
- In the far column, delete all the text in the column. Type in owner, and format it as Heading 4.
- Press enter and place the owner’s name and address below the heading. Place line breaks between each line in the address. We will add a style that will make the address fit better in a later step.
- Delete all of the text except the main heading in the center column.
- Save the file.
Step 6: Adjust the Styles
- Place your cursor next to the image in the header section, and click div.header in the information bar at the bottom of the editor window.
- Collapse the files panel (double-click the tab) and expand the CSS panel. Select the current button from All/Current at the top, and locate the small window in this pane labeled Properties for “.header.”
- Click the add property link at the bottom of the list, and select background-color from the drop list.
- Click on the small color square in the value section to get the eyedropper. Select the innermost color band on the rainbow image.
- Click on the background property that was already there, then click the trash can in the lower right corner of the CSS Property pane.
- Replace the text in the footer section of the page with the following line: Copyright 2012 Rainbow Daycare LLC – All International Rights Reserved.
- Set your cursor just before 2012 in the line and select Insert → HTML → Special Characters → Copyright. This will place the symbol in the page. Space appropriately. Save the file.
- Click on the thrColFixHdr.css tab at the top of the editor window. This will open the style sheet.
- Locate the class .header in the styles. Copy the property and value from the .header class.
- Locate the .footer class in the file. Replace the background property with the clipboard content that you copied from the header class.
- Add a property at the bottom of the .footer class for font-size. Set the value to 85%.
- Add another property, this time for color. Click on the painter’s palette symbol in the pop-up suggestions to get a color selector. Pick a bright shade of yellow.
- Add a new class with the following values: .smallFont {font-size: 85%; }.
- Save the CSS file.
- Return to the design view of the index page. Select the paragraph with the owner’s name and address in the right column. Apply the new class to the paragraph using the property inspector.
- Save the file. You now have the base template for the rest of the site.
- CIS 363A Lab 1 Create an Online Resume,
- CIS 363A Lab 2 Create a Website Using Dreamweaver,
- CIS 363A Lab 3 Create a Web Page Using CSS,
- CIS 363A Lab 4 Create a Website with Slideshow,
- CIS 363A Lab 5 HTML Form with Validation and Proper Designing,
- CIS 363A Lab 6 JavaScript For New Year’s Eve
CIS 363A Step 7: Create and Test the Other Pages
- Collapse the CSS panel and expand the files panel.
- Save the index.html file as about.html. Dreamweaver will open this as a new file and focus on the new page.
- Select the image in the header, and use the property inspector to set the link to index.html.
- Save the file, then save the file as staff.html, contact.html, and rates.html.
- Each of the files is now open in the editor. Place a line in each file below the Heading Level 1 in the center column that will identify the page.
- Save All.
- Test the file in the browser. Set the focus on the index page, and select the globe in the middle of the design toolbar. Select a browser. When the page loads, click through the links in the navigation menu. When you reach the rates page, click on the logo to return to the index.html page. CIS 363A
Step 8: Populate the Pages
- The data document is arranged by page. Change the Heading 1 for each page to an appropriate title for that content, and use the content supplied for that page.
- Here is the formatting suggestion for each page.
- Index—Use a paragraph.
- About—Use paragraphs, with a bullet list for activities.
- Staff—Use a bullet list, indented for each group.
- Contact—These are labels and values separated by colons, line breaks for phone, e-mail, and address. Place the promotion statement in a paragraph at the bottom and style appropriately.
- Rates—This is a three-column table. Age, hours, and rates are the column headers.
CIS 363A Step 9: Prep for Turn-In.
- Save all files. Locate the w2Lab folder in Windows Explorer and select it.
- Right-click and select Send To and choose compressed file.
- Rename the file Lastname_w2Lab.zip, where Lastname is your last name.
- Place this in the Dropbox for grading.
Deliverables
Submit a Week 2 Lab folder, including
- index.html;
- about.html;
- contact.html;
- staff.html;
- rates.html;
- CIS363A_W2_LabA_graphic.gif; and
- thrColFixHdr.css.
- Word or Visio Storyboard Diagram document
[table]
Deliverable, Points
Word or Visio document with storyboard, 5
Completed website based on project specifications, 25
Correct external CSS file that attaches to each page, 10
Total, 40
[/table]
- CIS 363A Lab 1 Create an Online Resume
- CIS 363A Lab 2 Create a Website Using Dreamweaver
- CIS 363A Lab 3 Create a Web Page Using CSS
- CIS 363A Lab 4 Create a Website with Slideshow
- CIS 363A Lab 5 HTML Form with Validation and Proper Designing
- CIS 363A Lab 6 JavaScript For New Year’s Eve
CIS 363A CIS363A CIS/363A ENTIRE COURSE HELP – DEVRY UNIVERSITY
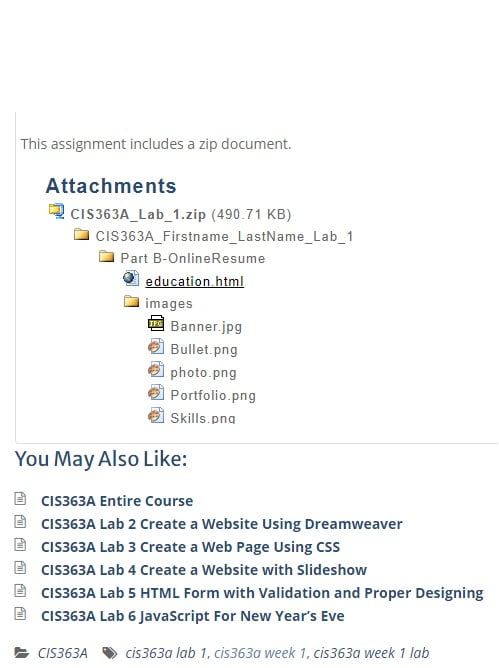
CIS 363A Lab 1 Create an Online Resume
You want to create an online resume where you can show off your skills to potential employers. Start by creating a simple 4-page website. You can keep adding to this site as you progress through your program, updating it with your knowledge, skills, and examples of projects you have done.
Create a home page with some information about yourself. Create a page for your educational background, a page for your work experience, and a portfolio page with a list of projects you have created. Link them all together and add appropriate graphics.
- CIS 363A Lab 1 Create an Online Resume,
- CIS 363A Lab 2 Create a Website Using Dreamweaver,
- CIS 363A Lab 3 Create a Web Page Using CSS,
- CIS 363A Lab 4 Create a Website with Slideshow,
- CIS 363A Lab 5 HTML Form with Validation and Proper Designing,
- CIS 363A Lab 6 JavaScript For New Year’s Eve
CIS 363A iLAB STEPS
Lab Preparation
For this lab, you will need to use Visio to create your site map. If you do not have Visio installed, be sure to try Visio in the iLab early in the week in case you experience any issues. To create the .html files, you can use Notepad or Dreamweaver (available in the iLab). You will also need to know how to copy and/or save files from the iLab server to your computer as well as how to zip files. Be sure to view the tutorials in the Student Resources area in Course Home if you are not sure how to do this.
Part A: Site Map
Step 1: Create Site Map using MS Visio
- Log onto the iLab server and start MS Visio.
- Create a New File. Select Software and Database for the Template Category. Select Web Site Map for the Template.
CIS 363A Step 2: Add Pages to Site Map
- Add the home page object, and 3 HTML objects.
- Label the objects appropriately for your index page, education page, work experience page, and portfolio page.
- Use the Dynamic Connector to add appropriate links between the pages.
Step 3: Save File
- Save the file to your local computer (NOTE: your local drive is mapped as the V: drive in the iLab). Put in an appropriate folder on your computer where you can easily find it.
Be sure you remember where you save the file.
- CIS 363A Lab 1 Create an Online Resume,
- CIS 363A Lab 2 Create a Website Using Dreamweaver,
- CIS 363A Lab 3 Create a Web Page Using CSS,
- CIS 363A Lab 4 Create a Website with Slideshow,
- CIS 363A Lab 5 HTML Form with Validation and Proper Designing,
- CIS 363A Lab 6 JavaScript For New Year’s Eve
Part B: Web Pages
Step 1: Create Home Page
- Create an index.html page.
- Add some general information about yourself.
- Add a picture. It could be a picture of you, or something you find interesting or related to your field of study. Be sure you have permission to use the picture.
- Include at least 3 text formatting tags, such as heading level, bold/strong, italics/emphasis, etc.
- Hints: If using Dreamweaver, start by creating a Site first, then add pages to the site (instead of starting by creating individual .html pages outside of any site).
- See textbooks and tv.adobe.com for information on HTML and working with Dreamweaver.
Step 2: Create Education Page
- Create an education.html page.
- Add information about the schools you have attended, major, classes taken, expected graduation, etc.
- Consider adding pictures of your campus or school.
CIS 363A Step 3: Create Knowledge/Skills Page
- Create a skills.html page.
- Add information about the knowledge or skills you have. Add areas of interest that you would like to pursue (such as mobile development, cloud computing, etc.).
Step 4: Create Portfolio Page
- Create a portfolio.html page.
- Add a list of projects you have done in your classes. If you do not have any projects yet, add some projects you would like to work on. Later, you can create links to .zip files with your projects but this is not necessary at this time.
Step 5: Create Links
- Using your site map for reference, create appropriate links from your home page to the other pages.
- You may also want to create links directly from one page to the next (e.g., from the education page to the skills page, etc.).
Part C: Submit Deliverables
Step 1: Copy Files from iLab Server (if necessary)
- If you saved your files on the iLab server, use Windows Explorer in the iLab to copy them to your local computer (do NOT use your local copy of Windows Explorer).
- Be sure to remember where you saved your files. Be sure to copy your site map and all files used in your website, including graphics.
- CIS 363A Lab 1 Create an Online Resume,
- CIS 363A Lab 2 Create a Website Using Dreamweaver,
- CIS 363A Lab 3 Create a Web Page Using CSS,
- CIS 363A Lab 4 Create a Website with Slideshow,
- CIS 363A Lab 5 HTML Form with Validation and Proper Designing,
- CIS 363A Lab 6 JavaScript For New Year’s Eve
Step 2: Zip Files
- Zip all of the files from Part A and Part B into a single zip file.
- Make sure the .zip file has your name, class, and assignment number on it (e.g., CIS363A_John_Doe_Lab_1.zip).
Step 3: Submit Files
CIS 363A Deliverables and Grading Rubric
[table]
Part Deliverable, Points
Part A Site Map~~- Appropriate icons used for site components (5 Points)~~- Dynamic connectors used (5 Points) ,15
Part B Web Pages~~- All pages included (5 Points)~~- Links working (5 Points)~~- Appropriate graphics used (5 Points)~~- Well-formed HTML code (5 Points),15
,Total 30
[/table]
- CIS 363A Lab 1 Create an Online Resume,
- CIS 363A Lab 2 Create a Website Using Dreamweaver,
- CIS 363A Lab 3 Create a Web Page Using CSS,
- CIS 363A Lab 4 Create a Website with Slideshow,
- CIS 363A Lab 5 HTML Form with Validation and Proper Designing,
- CIS 363A Lab 6 JavaScript For New Year’s Eve